Car Interior Detailing: Dialing In Your Car's Interior


It may come as a surprise that as obsessed as I am about most things in my life, I’ve always hated car interior detailing. The main reason for this is I always end up sweating. And unless I’m working out, I hate to sweat. Even though it's a pain for me to do interior detailing, it’s a step in the car cleaning process you don’t want to put off.
I knew in order to provide a complete car detailing solution, I would have to have a collection of car interior cleaning products to make this end-to-end process work. It’s something about dialing in your car’s exterior and interior that gives you a feeling of accomplishment. As much as I have reluctantly done this step, I’m always pleased with how well it comes out and how good it feels to drive around town in a completely clean car.
Dialing In Your Car’s Interior
First off, let me explain what dialing in your car’s interior means. I have used the phrase “dialed in or dialing in” for many years, and it’s become a foundational principle my company follows. I’ve always found opportunities to make something a better version of itself. In this context, dialing in our interior means improving its look by giving it a good deep cleaning with the best interior car cleaner and maintaining it with weekly or bi-weekly detailing.
Interior detailing consists of more than just spraying your dashboard down with a cleaner and vacuuming your floor mats; there are other components you also have to address.
- The interior windows with a car glass cleaner. Over time, your car’s interior windows will begin to build up layers of funk that can cause fogging and poor visibility if you don't attend to it. Although important, I’m more focused on just keeping them clean because the rest of my car is clean. I also like to tackle my windshield and rear window with a glass cleaning microfiber towel and a reach tool.
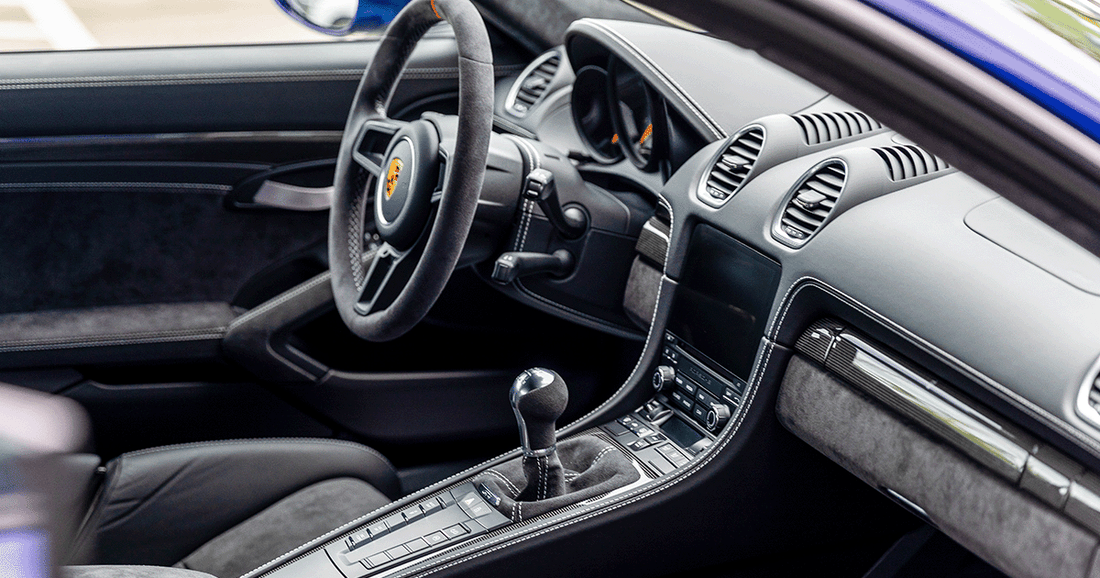
- The car’s steering wheel. All-day long, we’re touching and picking things up and then carrying that dirt/oil back to our vehicles. Extensive interior cleaning entails addressing the steering wheel with a product like P&S Interior Cleaner and a cleaning brush or an interior microfiber towel. You can use an Alcantara and Upholstery Cleaner with a microfiber towel if you have Alcantara.
- The interior pieces. When you’re doing inside car cleaning, you want to use the right tools for the job at hand. If you’re doing a deep cleaning, you’ll want to use your interior cleaner with a car detailing brush to get inside the cracks and crevices. You shouldn’t have to do this deep cleaning process often if you regularly maintain your vehicle’s interior. I also hope you’re not someone who eats cheeseburgers or other foods in your car. If you want to keep your vehicle clean, just eat/drink when you get home.
It can be challenging to keep your car's interior clean, especially when you have a family, or you’re transporting people around. I’d suggest telling people not to eat or drink in your car. You also may have to do your interior detailing more frequently if the former scenario persists.
Again, you don’t want to get behind on this process - your vehicle’s interior can stay clean if you prioritize it.
Steps To Dial In Your Interior
The chances of you messing anything up when it comes to interior detailing are minimal. As long as you are using the right products and following basic interior detailing methods, you can’t screw anything up.
My process has been relatively simple over the years. However, I know there are newer ways to dial in your car’s interior, so I’ve taken on some new approaches. Below, you will find a more exhaustive (deep cleaning) method to tackling your car's interior. These steps will work with most interiors, whether cloth or leather. I will dig deeper into the leather maintenance side later in this article.
- Roll all your windows down. I always start with my door panels. What I don’t want to happen when I spray P&S Interior Cleaner on the panels is to get it on my windows. That’s happened to me before and it made my windows smeary. Spraying the entire interior door panel (sparingly) allows me to use both my interior towel and small detail brush when I need them on different parts of the door. I will use my detail brush on the door handle as well as on my car window buttons. For all other parts of the door, I am grabbing my interior towel and wiping it down to get the bulk of the interior cleaner off and then another wipe down to flatten it out.
- Instrument panel. Once again, I’m using my small detail brush to get all those tight areas my interior towel won’t. Yes, you will be turning your heat on, heat off… ac on, ac off… hazard lights on and off. This is what happens when you’re wiping things down on your center console. I assume you have some kind of 7”, 9”, 12” screen. If so, you want to use our blue waffle weave towel with Invisible Glass.
- Dash. Pretty straightforward. I like to spray my interior towel vs spraying the dash itself. Why? No overspray on the windshield. Use one side of the towel for the initial wipe and then the other side of the towel to flatten it out. I’m folding my towel in quarters during this process. You can also use an interior brush with a larger head to cover bigger areas.
- Vacuum the seats and floor. Vacuum mats outside of the car (which includes getting any dirt underneath them off). A few spritzes of what I’d consider the best car air freshener Angelwax Eden on the floor and lower air ducts (while AC is on high) and done. Doing this allows the scent to flow through the vents, and whenever you turn them on, you get a fresh smell. This stuff usually lasts an entire week, considering you aren’t eating food in your car or hauling around funky crap.
If you stay on top of this process, your car's interior will remain clean and you'll rarely have to do any serious deep cleaning.
Reviving Your Car’s Leather with Car Leather Cleaner

I know many people have leather interior in their cars, so I wanted to have a solution that addressed this as well. Back in 2019, I had a chance to chat with Lars and Ram from Colourlock (a company that specializes in leather and Alcantara cleaning) about the Colourlock product line. When we sat inside my then BMW F10 M5, they gave me a full tutorial on using the leather cleaner, leather shield, and leather protect. I’m telling you, I was blown away by the results of these products. By far, Colourlock has the best leather cleaner for cars I’ve gotten my hands on.
I didn’t want to purchase car leather cleaning products from companies that didn’t specialize in it. Colourlock’s sole purpose is to make these types of products and they do a darn good job doing it. When treating your leather, there will be more steps involved than your standard cleaning with cloth interior. The way I’m doing it, which is the obsessed way, will require extra time to get it dialed in perfectly—time well spent.
Here’s how we approached dialing in my M5’s interior:
- Get it cleaned. We decided to use the strong leather cleaner on the seats because the car was used and the previous owner didn’t take great care of them. So, we shook the bottle to ensure all the chemicals were mixed for maximum performance. We then squirted the product onto a cleaning brush and began working the product into the leather in a circular motion. One thing to note, you want to apply the strong leather solution onto the brush and not directly on the leather surface. We want to get even coverage, and we also don’t want liquid seeping into the cracks of the seat, causing buildup (making the seat feel thicker). Once the product had been applied, we then wiped it off with an interior microfiber towel.
- Get it protected. After your leather has dried from the cleaner, it’s time to get it protected. In this step, we’re using leather protector with a foam sponge applicator to protect your leather from UV, prevent decay, and make the leather supple again. Simply put a few dabs of solution on the foam applicator, wipe it on the leather’s surface, and then wipe it off with an interior microfiber towel.
- Get more protection. After the leather protector has been applied, you’d wait 24-48 hours and apply leather shield, using the same process with the leather protector. This is going to be your first line of defense. In other words, protection for the protection or your sacrificial layer - similar to putting a hydrophobic coating on top of a ceramic coating on your car’s paint.
There’s obviously some work you’re going to have to put in, but I’m telling you, the outcome will be well worth it.
Dialing in your car’s interior the Obsessed Garage way requires patience, some basic detailing knowledge, and a desire to see improved results. This isn’t rocket science; it’s simply a desire to make something the best version of itself.


